Author’s Note
Hi, I am Bonny Elangbam. Elementor isn’t slow by default; it is only as fast as the setup behind it. Most performance issues come from poor hosting, unoptimized assets, and misconfiguration.
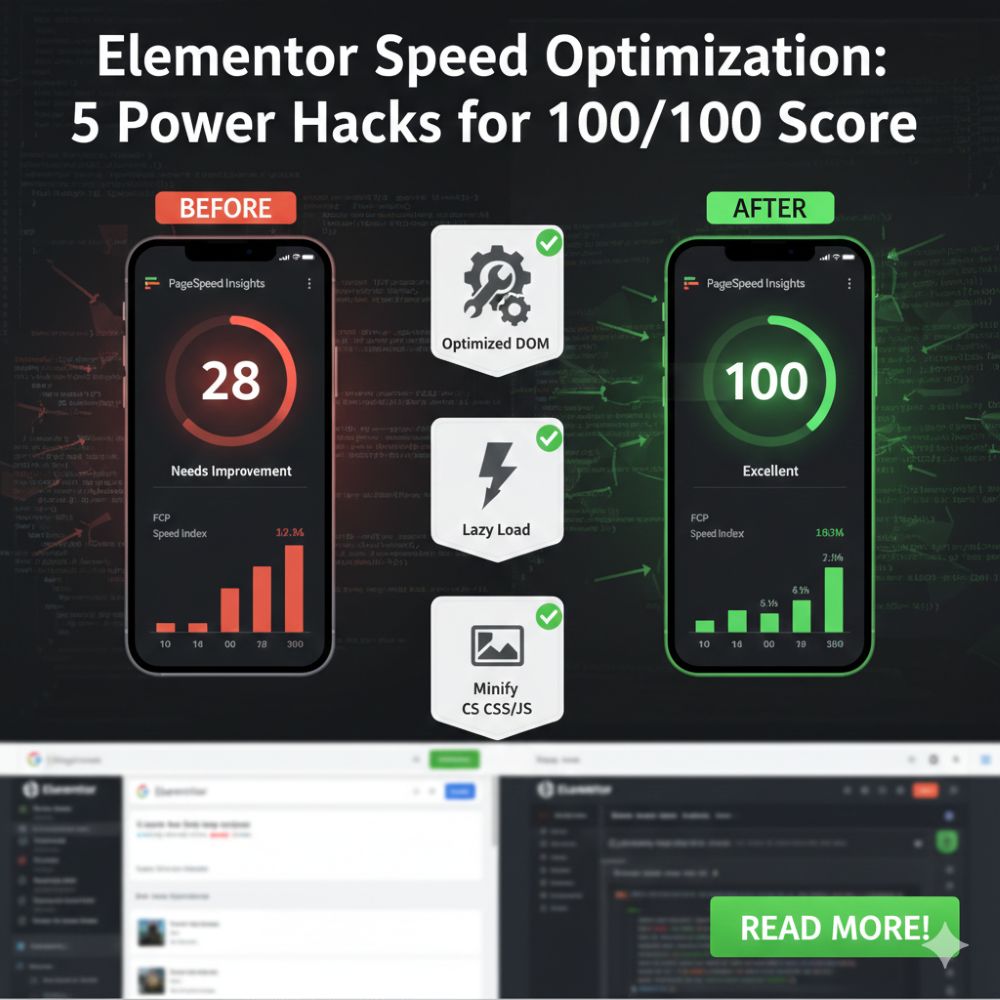
I wrote this guide to remove the guesswork from Elementor speed optimization and help you achieve a true 100/100 PageSpeed score without sacrificing design.
In the modern digital landscape, speed is the silent killer of conversion rates. We’ve all experienced the frustration of clicking a promising link only to be met with a white screen and a spinning loading icon.
Usually, users give a site about three seconds before they hit the “back” button. In fact, if your site takes longer than five seconds to load, your bounce rate increases by over 100%.
For those of us using Elementor, the stakes are even higher. Because Elementor allows for rich, complex designs, it’s easy to get carried away with high-resolution images, intricate animations, and multiple widgets.
Without a strict Elementor Speed Optimization strategy, these elements can quickly degrade your performance. However, when managed correctly, Elementor can be one of the fastest ways to deliver a premium user experience.
Why Data-Driven Speed Matters
Google’s introduction of Core Web Vitals (CWV) changed the SEO game forever. It shifted the focus from “total load time” to “user-perceived performance.” Google now measures things like:
- Largest Contentful Paint (LCP): Time for the main content to fully appear on the screen.
- Interaction to Next Paint (INP): How responsive the page is to user clicks and taps.
- Cumulative Layout Shift (CLS): How much the page “jumps around” while loading.
If you want to rank on the first page of Google in 2026, you must master Elementor Speed Optimization. It is no longer an optional “extra”; it is the foundation of your SEO and user retention strategy.
Comparison: Default vs. Optimized Elementor Performance
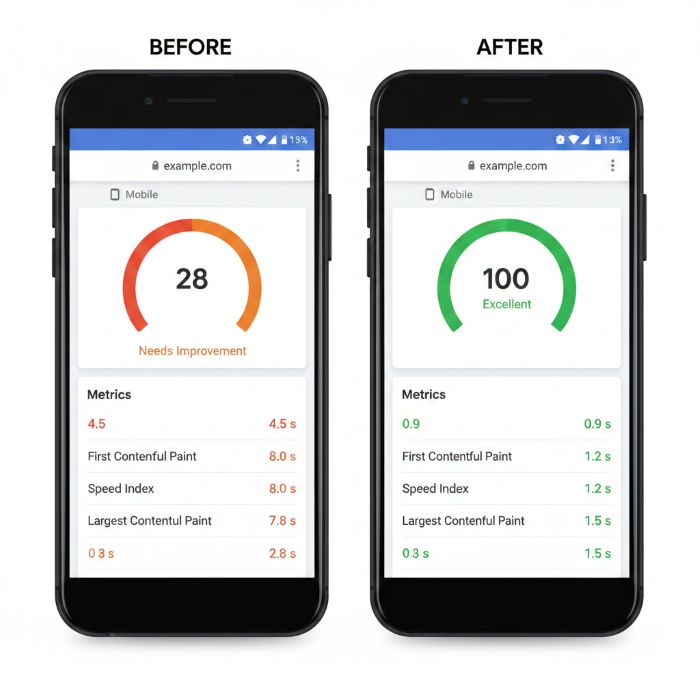
To understand the power of these hacks, let’s look at the data:
| Metric | Typical Unoptimized Site | After Elementor Speed Optimization |
| Google PageSpeed Score (Mobile) | 42 / 100 | 98 – 100 / 100 |
| Largest Contentful Paint (LCP) | 4.8 seconds | 1.1 seconds |
| Total Blocking Time (TBT) | 850 milliseconds | < 50 milliseconds |
| Cumulative Layout Shift (CLS) | 0.25 (Poor) | 0.01 (Excellent) |
| Average Page Weight | 3.2 MB | 750 KB |
Hack 1: Activate Elementor’s Internal Performance Experiments
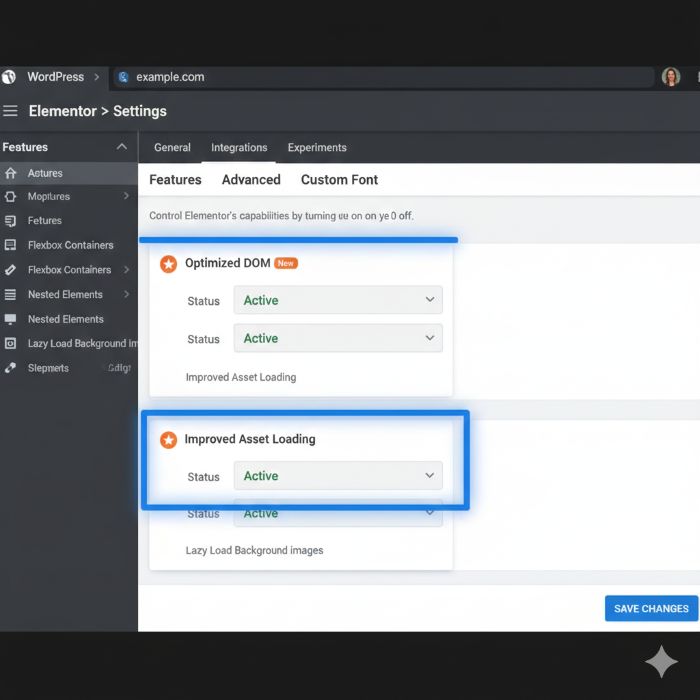
Navigate to Elementor → Settings → Features to find these.
Enable: Optimized DOM Output
This is the “anti-bloat” setting. It removes unnecessary wrapper <div> tags from your code. Fewer tags mean a lighter page and a faster “Browser Paint” time.
Enable: Improved Asset Loading
This ensures Elementor only loads the JavaScript needed for the widgets currently on the page. It’s the easiest way to cut down on “Unused JS.”
Enable: Inline Font Icons
Instead of loading a heavy FontAwesome library for a single “Arrow” icon, this renders icons as SVGs. This saves a full HTTP request and speeds up your header load.
Hack 2: Surgical Asset Management (The “Unloading” Method)
One of the most advanced Elementor Speed Optimization techniques involves managing your “enqueue” list. Even if you aren’t using certain WordPress features (like emojis, global styles for blocks you don’t use, or specific plugin scripts), WordPress often loads them globally.
I recommend using a tool like Asset CleanUp or Perfmatters. These allow you to enter a “Script Manager” mode. Here, you can look at your homepage and say: “I don’t need my Contact Form 7 scripts loading here because the form is only on the Contact Page.”
By “unloading” these scripts on a page-by-page basis, you can reduce your HTTP requests by 50% or more. This is the difference between a site that feels “okay” and a site that feels “instant.”
Hack 3: The Next-Gen Media Revolution
Images are almost always the biggest culprit behind a slow Elementor site. If you are uploading JPEGs directly from a camera or stock site, you are sabotaging your Elementor Speed Optimization efforts.
Step-by-Step Image Workflow:
- Resize Before Upload: If your website container is 1200px wide, your image should not be 5000px wide. Use an editor to crop it to the exact dimensions needed.
- WebP Compression: WebP is a modern image format that supports both lossy and lossless compression. It typically reduces image file sizes by 30-80% compared to JPEGs and PNGs, with no visible loss in quality.
- Lazy Loading for Backgrounds: Elementor natively supports lazy loading for the “Image” widget, but background images in sections often load immediately. Use a performance plugin to ensure background images are also lazy-loaded to save initial bandwidth.
- SVG for Logos and Icons: Always use SVGs for logos. They are infinitely scalable, crystal clear, and take up virtually zero space.
Hack 4: Boost Speed with Caching & Edge Delivery
You cannot reach 100/100 on budget hosting. Your server is your engine.
Once you have a solid host, use the “Holy Trinity” of caching:
- Server-Level: Use LiteSpeed Cache if on a LiteSpeed server; otherwise, WP Rocket is your best friend for Nginx/Apache.
- Object Cache: Use Redis or Memcached to accelerate database queries and reduce load times.
- Edge Caching: Use Cloudflare APO (setup above) to serve your site from the server closest to your visitor.
Quick Setup: Cloudflare APO
Cloudflare APO is the single best $5/month you can spend on speed. It puts your site’s “brain” on servers globally.
- In Cloudflare: Go to Speed → Optimization and toggle Automatic Platform Optimization to On.
- In WordPress: Install the Cloudflare Plugin.
- The Link: Go to the plugin settings, enter your API token, and toggle “Apply Recommended Cloudflare Settings.”
- Verify: Check the “APO” toggle within the WordPress plugin to ensure it says Active.
Hack 5: Transition to Flexbox Containers
If you are still building with “Sections” and “Columns,” you are using an outdated architecture. Elementor’s Flexbox Containers are the single greatest structural improvement for Elementor Speed Optimization.
Containers allow you to achieve the same layouts with significantly fewer “div” tags. They are more mobile-responsive by nature and give you granular control over how elements stack.
By converting your old sections to containers, you can often improve your “Total Blocking Time” (TBT) and “Cumulative Layout Shift” (CLS) metrics instantly because the browser has less work to do to calculate the layout.
Why Containers Win the Speed Race
Think of the “old way” as a box inside a box inside a box. Each extra wrapper forces the browser to do more layout calculations before it can display your content, directly hurting speed and responsiveness.
- Left Side (The Old Way): An icon of a nested Russian Doll labeled: Section → Column → Inner Section → Column → Widget (5 Layers).
- Right Side (The Flexbox Way): An icon of a flat tray labeled: Container → Widget (2 Layers).
- Caption: Flexbox Containers reduce DOM depth by up to 70%, directly improving your Interaction to Next Paint (INP) scores.
Troubleshooting Performance Plateaus
Sometimes you follow all the steps and still hit a “plateau” at an 85/100 score.
Here is how to break through:
- Check for “Third-Party Script” Bloat: Tools like Google Analytics, Facebook Pixel, and Hotjar are heavy. Use a tool like Perfmatters to delay these scripts until the user scrolls.
- Audit Your Plugins: If you have 30+ plugins, you are likely suffering from “plugin drag.” Ask yourself if you can achieve the same result with a simple snippet of code or a native Elementor feature.
- Optimize Your Database: Over time, your database gets cluttered with old post revisions, trashed comments, and “transients.” Use WP-Optimize once a month to keep the backend lean.
Pro UX Rules for Speed
- The 500ms Rule: Aim for a “Time to First Byte” (TTFB) of under 500ms. If your server takes 1 second just to respond, you’ve already lost the battle.
- Visual Stability: Always define the width and height of your images in the code. This tells the browser exactly how much space to “reserve,” preventing the content from jumping when the image finally loads.
- Minimalism is Key: Just because you can use five different entry animations doesn’t mean you should. Every animation requires JS processing power. Use them sparingly for maximum impact.
The 100/100 Elementor Speed Checklist
- [ ] Theme: Are you using a lightweight theme like Hello Elementor or GeneratePress?
- [ ] Structure: Have you converted all Sections/Columns to Flexbox Containers?
- [ ] Images: Are all images in WebP format and under 150KB?
- [ ] Fonts: Are you using Swap display and hosting fonts locally?
- [ ] Scripts: Have you enabled Delay JavaScript Execution in your caching plugin?
- [ ] External: Are third-party scripts (Pixel, Analytics) delayed until user interaction?
- [ ] Server: Is your TTFB (Time to First Byte) under 500ms?
Master the Elementor Speed Optimization Process
Building a fast site is a journey of a thousand tiny choices. By mastering the Elementor Speed Optimization workflow, you are doing more than just pleasing a Google algorithm; you are respecting your visitors’ time.
A fast site is a trustworthy site. It suggests that you care about the details and that you are professional. Whether you are building a personal portfolio or a massive e-commerce store, speed will always be your most important “feature.”
The power of Elementor is that it doesn’t box you in. As you grow more comfortable with these hacks, you can start exploring custom CSS, head-tag optimization, and even headless WordPress setups. The ceiling is high, now it’s time for you to start climbing.
Ready to see your site fly? Implement these five hacks today and watch your scores soar! If you find yourself stuck or simply don’t have the time to tinker under the hood, my team at Keithel Digital is here to help. We live and breathe performance.
Would you like me to take a look at your current GTmetrix report and point out the specific “bottlenecks” holding you back? Let’s chat in the comments.
Does Elementor Pro slow down my site?
Contrary to popular belief, no. Elementor Pro actually helps with Elementor Speed Optimization because it allows you to delete several standalone plugins (like pop-up builders, contact forms, and slider plugins) and replace them with native, optimized code.
What is the best hosting for Elementor Speed Optimization?
Avoid “Bottom-of-the-barrel” shared hosting. I recommend Managed WordPress hosting like SiteGround, Kinsta, or Cloudways. Look for providers that offer NVMe storage and LiteSpeed server technology for the best results.
Can I get a 100/100 mobile score with Elementor Speed Optimization?
Yes. Mobile scores are harder due to weaker device CPUs, but with proper Elementor Speed Optimization, such as delaying JavaScript execution, serving WebP images, and using Flexbox Containers to keep the DOM clean, a 100/100 score is achievable.
Why is my Largest Contentful Paint (LCP) so high in Elementor?
High LCP is typically caused by an oversized, unoptimized hero image. For effective Elementor Speed Optimization, use a correctly sized WebP image and exclude it from lazy loading so it loads immediately.
Do speed plugins replace Elementor Speed Optimization best practices?
No. Speed plugins like WP Rocket enhance a well-built site, but can’t fix poor design choices. True Elementor Speed Optimization starts with lean layouts, optimized assets, and minimal plugins; caching comes last.