Hello, I’m Bonny Elangbam. With over 11 years of experience as a WordPress and Shopify Developer, I have seen the web evolve from static HTML pages to the dynamic, user-centric experiences we see today.
Throughout my career, I’ve helped hundreds of businesses transition from “just having a website” to owning a high-performance lead generation engine.
The most common hurdle for my clients? The fear of the “technical wall.” That is where this Elementor guide for beginners comes in.
Elementor isn’t just a plugin; it’s a bridge that allows creative minds and business owners to build professional-grade websites without needing a computer science degree.
Why Every Business Needs This Elementor Guide for Beginners
Early in my development career, even a small request like “can we move this button to the left?” often required an hour of coding and cross-browser testing. Today, the market moves too fast for that.
Elementor is a drag-and-drop visual builder. In this Elementor guide for beginners, that means you’re editing the front end of your site, which visitors actually see, rather than working in the back end.
The Core Philosophy of Visual Design
Before you drag your first widget, you must understand the “Box Model.” In this Elementor guide for beginners, we treat every element as a box within a box.
- The Section (The Container): This defines the background, height, and overall structure of a horizontal block on your page.
- The Column (The Divider): This allows you to place elements side-by-side.
- The Widget (The Content): These are the functional bits, text, images, videos, and buttons.
Navigating the Interface: Your First Step in the Elementor Guide for Beginners
When you first launch the editor, it can feel overwhelming.
Let’s break down the three primary zones you will interact with:
1. The Widget Panel (The Toolbox)
On the left side of your screen, you’ll find the search bar and the library of widgets. From basic “Text Editor” widgets to advanced “Price Tables,” everything starts here.
2. The Settings Tabs
Every time you click on an element, the sidebar changes to show three tabs:
- Content: What the element says or does (the link, the text, the image source).
- Style: How it looks (colors, typography, borders, shadows).
- Advanced: How it behaves (margins, padding, Z-index, and entrance animations).
3. The Responsive Toolbar
At the bottom of the panel, there is a small icon that looks like a desktop screen. In this Elementor guide for beginners, clicking it allows you to toggle between Desktop, Tablet, and Mobile views.
As a developer with 11+ years of experience, I cannot stress this enough: Design for mobile first. More than 60% of your leads will likely find you via a smartphone.
Building Your First High-Converting Page
A website is your 24/7 digital salesperson. If it doesn’t guide users toward a clear action, it’s failing.
That’s why this Elementor guide for beginners focuses on the exact page structure used to turn visitors into paying customers.
Crafting a Hero Section that Grabs Attention
The “Above the Fold” area is the most valuable real estate on your site.
To master this part of the Elementor guide for beginners, you need three things:
- A Clear Value Proposition: A heading that explains what you do in 5 seconds.
- Social Proof: A small badge or text mentioning your “11+ years of experience” or “100+ happy clients.”
- The Primary CTA: A high-contrast button that stands out against the background.
The Power of the Inner Section Widget
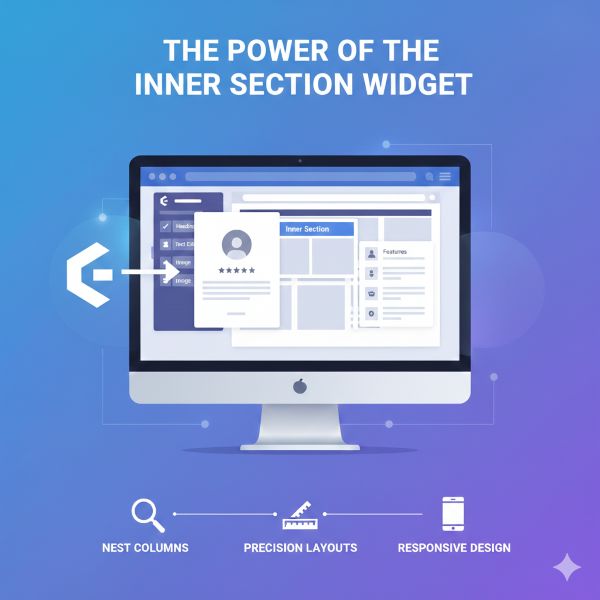
If you want to create complex layouts, such as placing a testimonial alongside a feature list, this Elementor guide for beginners recommends using the Inner Section widget.
It allows you to nest columns within columns, giving you the layout control and precision typically associated with professional development workflows.
More importantly, it helps you maintain proper spacing, alignment, and responsiveness across devices. When used correctly, Inner Sections reduce the need for custom CSS while ensuring your layouts remain clean, flexible, and easy to manage as your site grows.
Lead Generation: The Heart of Your Business
As a developer, my goal for every client is Return on Investment (ROI). In this Elementor guide for beginners, we focus heavily on the Form Widget.
Configuring the Elementor Form for Success
The Form widget (available in Pro) is a lead-gen powerhouse.
You can:
- Set Redirects: After a user submits a form, send them to a “Thank You” page with a special offer.
- HoneyPot Protection: Add a hidden field to stop spam bots without annoying your users with Captchas.
- Multiple Actions: Simultaneously send an email to yourself, save the lead in your WordPress database, and add the user to your Mailchimp list.
Advanced Design Tips for a Professional Finish
Once you have the basics down, this Elementor guide for business helps you move beyond “amateur”-looking sites and start building polished, conversion-ready designs that reflect a professional brand.
Here are the professional secrets I use for my high-ticket clients:
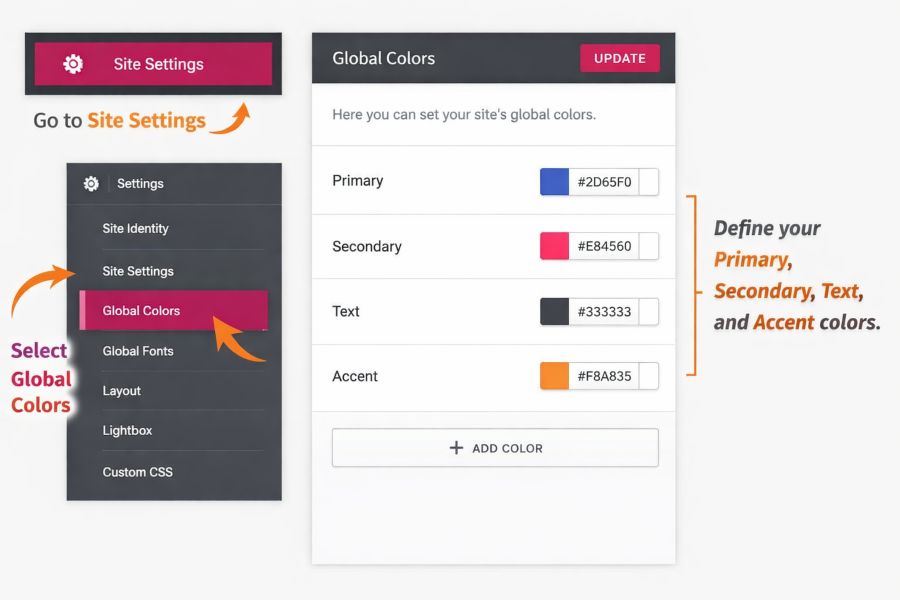
1. Global Site Settings
Don’t style every button individually. Go to Site Settings → Global Colors and define your Primary, Secondary, Text, and Accent colors here.
When you update your brand color in the future, you change it once, and it instantly propagates across all 50+ pages of your site.
This approach enforces visual consistency, reduces CSS bloat, and dramatically speeds up redesigns. It also prevents accidental color mismatches, ensuring every CTA, heading, and link aligns perfectly with your brand identity as your site scales.
2. Padding vs. Margin
One of the biggest mistakes beginners make is confusing these two.
- Padding is the inner spacing of an element, the space between its content and border.
- Margin is the space outside the element (between this box and the next one).
- Pro Tip: Use EMs or percentages instead of pixels for padding to ensure better scaling on different screen sizes.
3. Dynamic Tags
If you are building a blog or a portfolio, you don’t want to manually type the title on every page. That approach is error-prone and completely unscalable.
In this Elementor guide for beginners, we strongly recommend using Dynamic Tags (the small database icon) to automatically pull in the Post Title, Featured Image, author name, or publish date.
This method ensures consistency across templates, reduces repetitive work, and allows you to scale a website from 5 pages to 500 without breaking layouts, or your sanity.
Optimizing Performance and SEO
A beautiful site that takes 10 seconds to load will lose 53% of its visitors (Source: Google/Deloitte).
In this Elementor guide for beginners, performance is treated as a core design element, not an afterthought.
- Image Optimization: Never upload raw files. Convert images to WebP format and compress them using tools like TinyPNG. Aim for images under 150kb.
- Asset Management: Within Elementor settings, enable “Improved CSS Loading” and “Inline Font Icons.” This reduces the number of server requests, significantly lowering Largest Contentful Paint (LCP).
- Lightweight Frameworks: Pair Elementor with the Hello Theme. It provides the bare minimum code necessary, allowing the builder to achieve higher Core Web Vitals scores.
- Mobile-First Indexing: Since more than 60% of users browse on mobile devices (Source: Statista), Responsive Mode lets you hide heavy decorative elements on smaller screens for better performance.
Take the Leap into Professional Web Design
We have covered the essentials in this Elementor guide for beginners, from structure to lead generation. In my decade of experience as a developer, I’ve found that the best websites are those that balance visual appeal with technical performance.
Elementor provides the tools, but your strategy provides the results. If you are looking to skip the trial-and-error phase and launch a high-converting, professionally optimized site, let’s connect.
Ready to turn your vision into a high-performing digital powerhouse? [Book Your Free Strategy Consultation with Bonny Elangbam]
About the Author
Bonny Elangbam is a veteran WordPress and Shopify Developer with 11+ years of experience transforming static sites into high-performance lead engines.
Having helped hundreds of businesses bypass the “technical wall,” he specializes in balancing professional design with strategic ROI. Whether you’re navigating Elementor for the first time or scaling a global brand, Bonny’s expertise ensures your digital empire is built to convert. Ready to grow? Contact me today.
Is the free version of Elementor sufficient for a business site?
The free version covers basic layouts. However, for essential lead generation (Form Widget) and custom branding (Theme Builder), Elementor Pro is the industry standard for professional results.
Will Elementor negatively impact my page load speed?
Not if optimized correctly. By using the Hello Theme, caching plugins, and optimized images, you can achieve 90+ scores on Google PageSpeed Insights.
Can I switch themes after building my site with Elementor?
Yes. Because Elementor controls the content area, you can change your underlying theme. However, sticking to lightweight themes like Astra or Hello prevents layout conflicts.
Is Elementor better for SEO than standard WordPress blocks?
Elementor is highly SEO-friendly. It allows for clean HTML tagging (H1-H6) and integrates seamlessly with plugins like RankMath to manage your metadata and schema.
What happens if I stop my Elementor Pro subscription?
Your site remains live and designed as-is. You simply lose the ability to drag in new Pro widgets or receive plugin updates.